
Can you freeze green beans? Yes, you can…and they taste amazing! Learn how to freeze green beans in no time with this easy step by step tutorial!

One of the ways that I save quite a bit of money on groceries is by preserving lots of fruits and vegetables.
While we live in the city and don’t have room for a big garden, we’re blessed to live in an area where we can get lots of beautiful, homegrown produce for great prices. So I simply buy large amounts from local growers and then preserve them for us to enjoy all year long.
I know that canning and freezing produce sounds really daunting to many people, so I’ve done a number of step by step canning and freezing tutorials to show you just how simple the process really is.
Today I’m going to show you how to freeze green beans. Not only are they super easy to preserve by freezing, they also taste so much better than store-bought!
In fact, recently I saw a great deal on some frozen beans at the store and decided to buy a couple of bags thinking it would help stretch our supply since I hadn’t frozen as many this year as I probably should have.
I made them for dinner and after one bite my husband commented, “It’s no wonder so many people don’t like vegetables!”
And I had to agree. They just were nowhere near as tasty as the green beans that I freeze!
The benefits of freezing green beans vs. canning them
There are affiliate links in this post. As an Amazon Associate, I earn from qualifying purchases. Please read my full disclosure policy.
You can preserve your beans by canning or freezing them. If you choose to can them, you need to use a pressure canner![]() since using a regular canner doesn’t reach high enough temps to kill the bacteria that causes botulism.
since using a regular canner doesn’t reach high enough temps to kill the bacteria that causes botulism.
I find the pressure canning process rather time-consuming and tedious plus it also makes the beans less nutritious. Did you know that frozen veggies and fruit have almost as much nutritional value as when they are fresh?
So, I prefer to simply freeze our green beans. And once you see how amazingly easy it is to do, I think you’ll understand why!
Supplies for freezing green beans
- Dishpan or container to put the beans in
- Paring Knife (love this one!)
– You can also use your fingers to do this, but I find it harder and it doesn’t look as nice either. - Blancher
– You can use a big pot instead but it gets a bit complicated when it comes time to drain the beans and cool them quickly
(Don’t have a blancher and don’t want to buy one? See if you can find a friend that has one that you could borrow.) - Freezer bags or freezer-safe containers to store the beans
– I like using these freezer boxes.
How to Freeze Green Beans

1. Trim the bean ends
Remove the ends of the beans and any defective spots. If you have true “string” beans, remove the strings too.
Technically you don’t have to remove the tail end of the bean, just the end that was attached to the stalk. However, I don’t like the look of leaving them on so I remove them too.

2. Cut the beans into smaller pieces
Break or cut the beans into 1 to 1 ½ inch pieces.
If you have children, this is a step that even little children can help with. In fact, they often think it is fun!

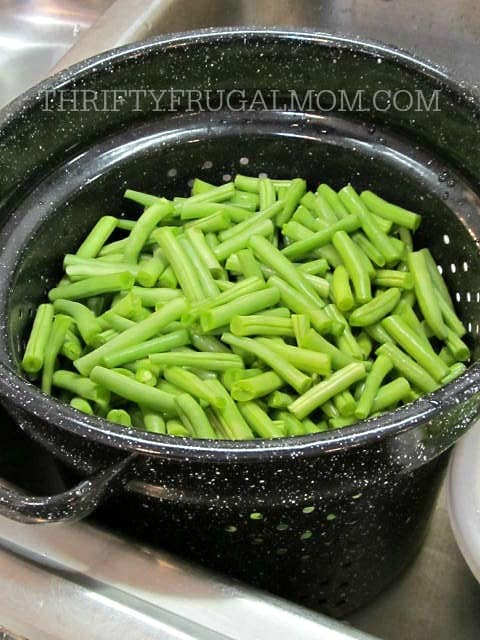
3. Wash the beans.
Wash the beans thoroughly in cold water. I like to put a dishpan full of beans in my sink and then just fill it with water.
Swish the beans around really well to work any dirt loose.
4. Fill the blancher’s colander
Move the beans over to the colander insert of your blancher![]() , filling it to just below the ridge.
, filling it to just below the ridge.
You want the beans to not go above the top row of holes so that they will be covered with water during the blanching process.

5. Fill the blancher with water
Fill the kettle part of the blancher about 2/3 to 3/4 full of water. You don’t want it too full because the water level will rise once you put the colander full of beans into it.
Bring the water to a full, rolling boil.
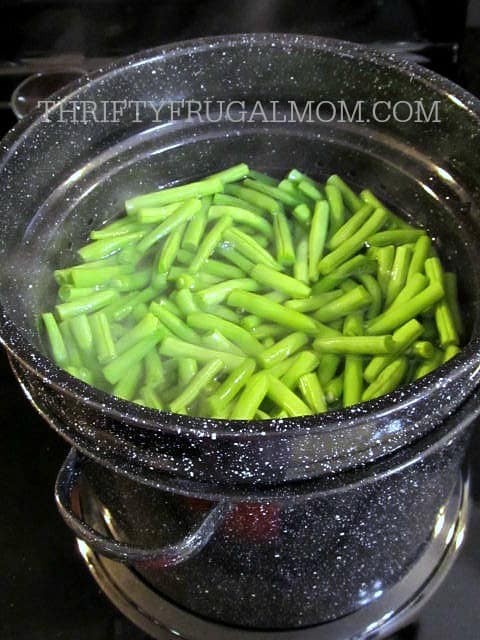
6. Insert the colander into the boiling water
Slowly (this is important so that the water doesn’t go splashing out!) insert the colander full of beans into the boiling water. Once you put the beans in, the water will stop boiling.

7. Bring the pot to a rolling boil
Watch the pot carefully and once the water comes to a rolling boil again, remove the beans immediately. You just want to slightly cook the beans.
(In the picture above I wasn’t watching the pot closely enough and it had been boiling for a bit when I noticed it. You don’t want that much of a boil! It isn’t tragic, but the beans just won’t taste quite as good.)

8. Cool the beans
While you are waiting for the beans to boil, fill a dishpan or sink with cold water- the colder the better.
Once you remove the beans from the boiling water, immerse the colander in the cold water, making sure that all the beans are submerged.
Cool the beans down as fast as possible. It helps to swish the colander around in the water, keep the water running, use your hands to move the beans around and even change the water if necessary.

9. Drain the beans
Once the beans are nice and cool, drain the water off of them.

10. Transfer beans to freezer-safe containers
Put the blanched beans in freezer bags or freezer-safe containers and freeze immediately.
I typically use these freezer boxes![]() to freeze our food just because I like the way they store and it’s also cheaper in the long run since you can use them over and over again.
to freeze our food just because I like the way they store and it’s also cheaper in the long run since you can use them over and over again.
And that’s all there is to freezing green beans! So easy, but it produces such tasty beans.
Also, while we’re on the subject of green beans, I highly recommend this amazing Cheesy Ham, Potato and Green Bean Casserole. It’s made totally from scratch and is total comfort food!

How to Freeze Fresh Green Beans
Equipment
- Dishpans or containers to put the beans in
- Paring Knife
- Blancher
- Freezer bags or freezer safe containers to freeze the beans in
Ingredients
- Green Beans
Instructions
- Remove the ends of the beans and any defective spots. If you have true “string” beans, remove the strings too. Technically you don’t have to remove the tail end of the bean, just the end that was attached to the stalk. However, I don’t like the look of leaving them on so I remove them too.
- Break or cut the beans into 1 to 1 ½ inch pieces.
- Wash the beans thoroughly in cold water. I like to put a dishpan full of beans in my sink and then just fill it with water. Swish the beans around really good to work any dirt loose.
- Move the beans over to the colander insert of your blancher, filling it to just below the ridge. Basically you want the beans to not go above the top row of holes so that they will be covered with water during the blanching process.
- Fill the kettle part of the blancher about 2/3 to 3/4 full of water. You don’t want it too full because the water level will rise once you put the colander full of beans into it. Bring the water to a full, rolling boil.
- Slowly (this is important so that the water doesn’t go splashing out!) insert the colander full of beans into the boiling water. Once you put the beans in, the water will stop boiling.
- Watch the pot carefully and once the water comes to a rolling boil again, remove the beans immediately. You basically just want to slightly cook the beans.
- While you are waiting for the beans to boil, fill a dishpan or sink with cold water- the colder the better. Once you remove the beans from the boiling water, immerse the colander into the cold water, making sure that all the beans are submerged. Cool the beans down as fast as possible. It helps to swish the colander around in the water, keep the water running, use your hands to move the beans around and even change the water if necessary.
- Once beans are nice and cool, drain the water off of them.
- Put the blanched beans in freezer bags or freezer-safe containers and freeze immediately.


Carrie
How do you prepare them when ready to eat?
ThriftyFrugalMom
You can cook them either frozen or partially thawed. Just add a bit of water (I typically do 1/2 to 1 cup per quart) and salt and then cover and simmer until they are as done as you like them. Some people prefer them slightly crunchy, others prefer them cooked until they are totally soft. Drain the water, and if you want, add some butter and/or other seasonings such as pepper, then enjoy!
Stephanie R
I have been wanting to start freezing more fresh veggies so we don’t waste as much. But do these still taste fresh whenever you dethaw them?
ThriftyFrugalMom
Stephanie, they taste a bit different than fresh ones, but I don’t think it’s a bad different. Have you ever had frozen green beans from the store? They are similar to that, only better because the ones from the store usually taste like they blanched them too long.
Nikki Frank-Hamilton
I have never frozen green beans, I pickle them yearly though. When you freeze them how long do they stay good? Is there a recommended time to eat them in? I am the only one in the family that likes green beans, if I could freeze them in small batches I could have my very own stash!
ThriftyFrugalMom
Oh, I’ve heard of pickling green beans, but have never tried it. I’m not a pickle fan, but my husband loves them and would probably enjoy if I did green beans that way.
About how long frozen green beans stay good- they should be fine for at least a year, if you use a deep freeze. (I’ve discovered fridge freezers don’t seem to stay as cold and as a result, don’t keep things as well.) I’ve actually had some a little longer and they’ve been okay too. It’s not like they spoil or anything, but the quality might slowly deteriorate.
Jennifer | The Deliberate Mom
This is great and what a budget saving tip! My father-in-law grows lots of green beans and we usually have an overabundance of them! I’ll have to keep this in mind.
Thanks so much for sharing (and for linking up to the #SHINEbloghop).
Wishing you a lovely day.
xoxo
ThriftyFrugalMom
Oh, it’s a great way to save those yummy green beans to enjoy later on in the year, Jennifer!
Helene
I remember my mom doing this but I didn’t know how! Thanks for the tutorial. I’ll be on it this summer!
ThriftyFrugalMom
Sure thing, Helene!
Julie@FrugallyBlonde
I love canning green beans, but I haven’t ever frozen them. I will have to give it a try. When I was a girl I loved swinging with my grandma and breaking the beans. We would just sit on the porch for hours swinging, talking and snapping the beans.