
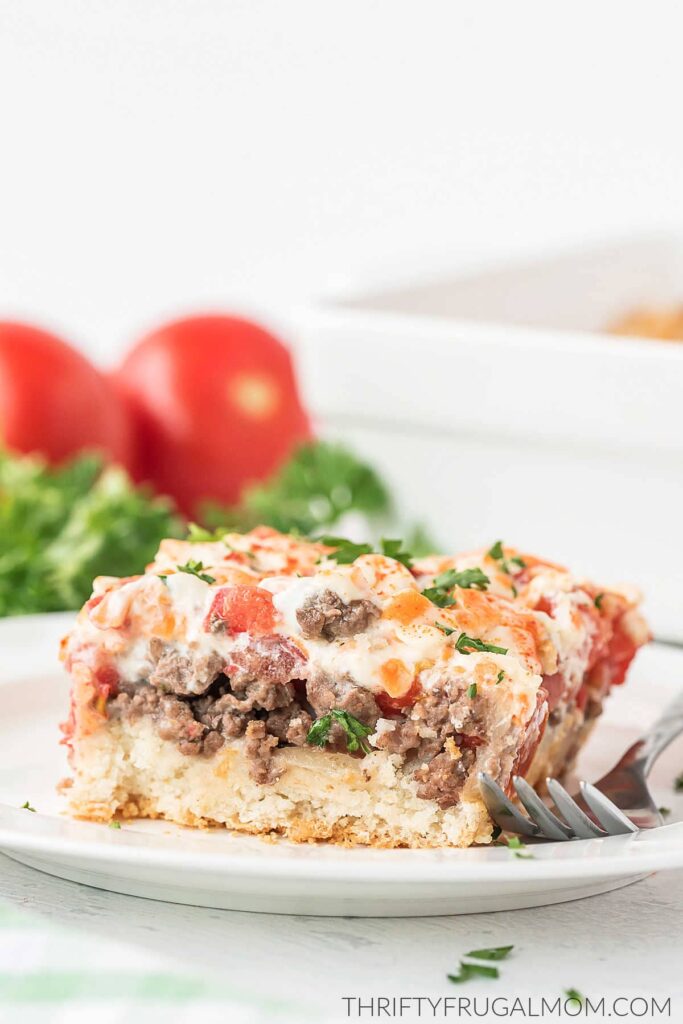
This easy recipe combines layers of ground beef, sour cream, cheese and tomatoes on top of a simple Bisquick crust. The perfect delicious, quick weeknight dinner!

There are affiliate links in this post – please read my full disclosure policy.
While our family doesn’t mind tomato soup and recipes that use cooked tomatoes, oddly enough, none of us are big fans of tomatoes when they are fresh.
But I love to garden and since tomatoes grow well and are easy to take care of, I always end up planting some. But then, of course, I find myself looking for ways to use up all those tomatoes that we harvest! Which is how I discovered this recipe.
Why We Love John Wayne Casserole
A comfort food type of recipe, this John Wayne Casserole is….hearty, creamy, flavorful and just plain delicious.
Our children all love it, even the pickiest eater. And I love that it helps to get them eating more tomatoes.
It is quick to prep and is ready to eat in just 45 minutes, which in my opinion is great for a weeknight dinner.
Plus, it’s also budget-friendly. And with grocery prices rising, that’s more of a help than ever!
Watch Video: Learn How to Make This Recipe
Ingredients Needed for John Wayne Casserole with Bisquick

- Ground Beef – You can easily swap for ground turkey if you prefer.
- Onion – This is my favorite handy gadget to make chopping the onions a cinch!
- Sour Cream – Greek yogurt works too, although I do think the sour cream gives it a slightly better taste overall.
- Mayonnaise
- Cheddar Cheese
- Garlic Powder – You can use granulated garlic or jarred minced garlic instead. See the recipe notes for more details on this!
- Bisquick – I personally like to use my homemade Bisquick Mix. It’s cheaper and I know exactly what ingredients are in it! But any variety of plain Bisquick should work fine, even gluten-free.
- Cold Water
- Tomatoes – If you don’t want to use fresh tomatoes, you can swap these for one (15 ounce) can instead. Or if you are like me and can diced tomatoes, you can substitute with a pint of those.
- Paprika
How to Make this Recipe
STEP 1: Preheat the oven to 375 degrees and grease an 8×8 baking pan, then set aside.
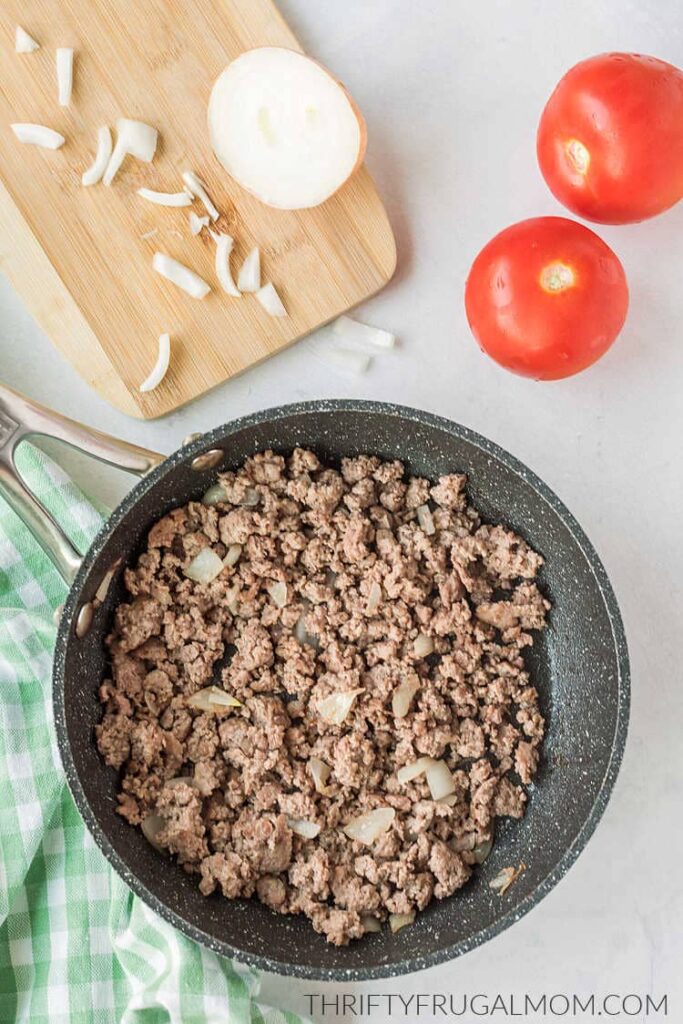
STEP 2: In a large skillet, brown the ground beef and diced onion (drain when fully cooked).
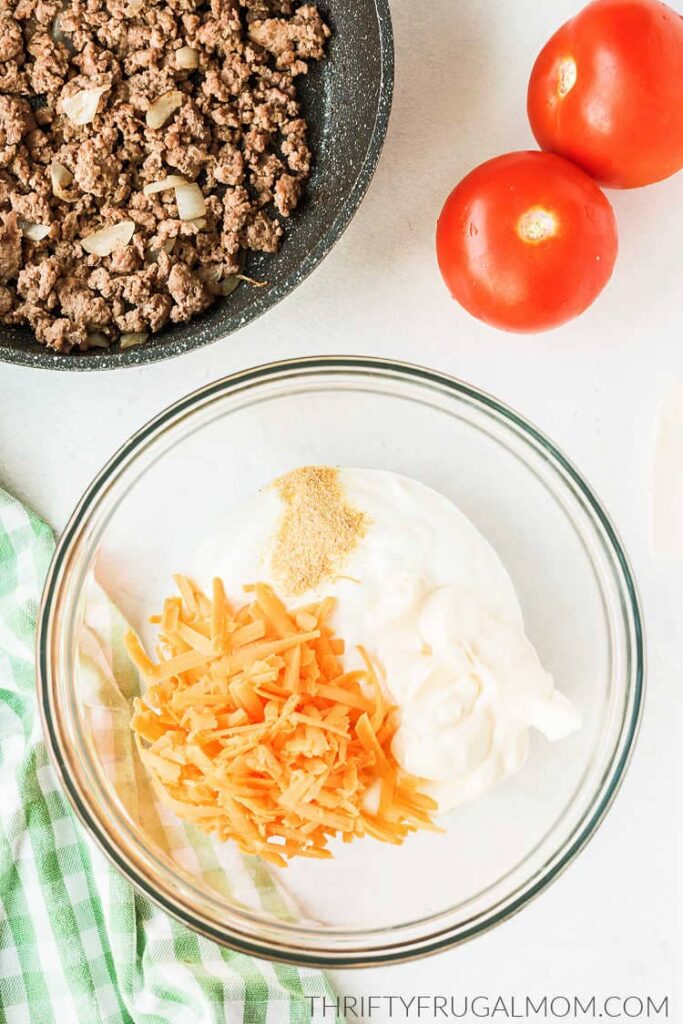
STEP 3: While that’s cooking, in a separate bowl combine the sour cream, mayo, cheese, and garlic powder, then set aside.
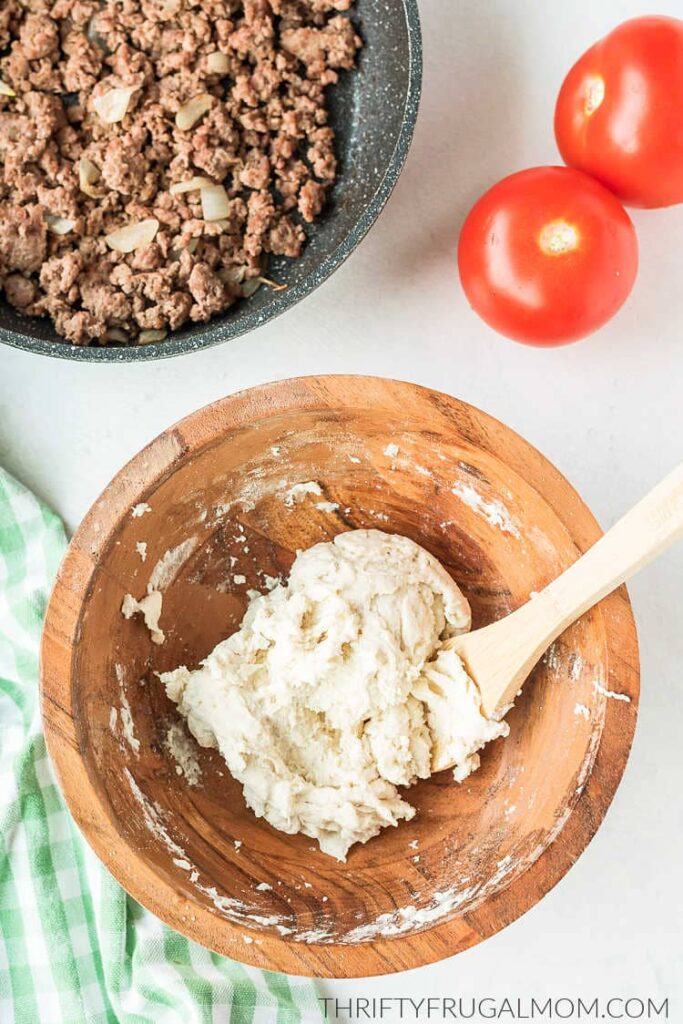
STEP 4: In another bowl, combine the cold water with the Bisquick mix and stir together until the dough forms. Then transfer the dough into the greased baking dish, and press to cover the bottoms and slightly up the sides of the pan. (You may want to keep your hands damp while you do this so the dough doesn’t get too sticky where you can’t work with it.)
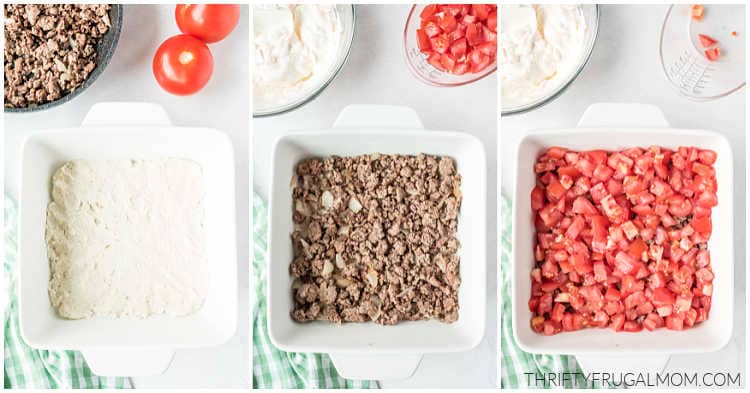
STEP 5: Layer the cooked ground beef, onions and tomatoes on top of the dough.
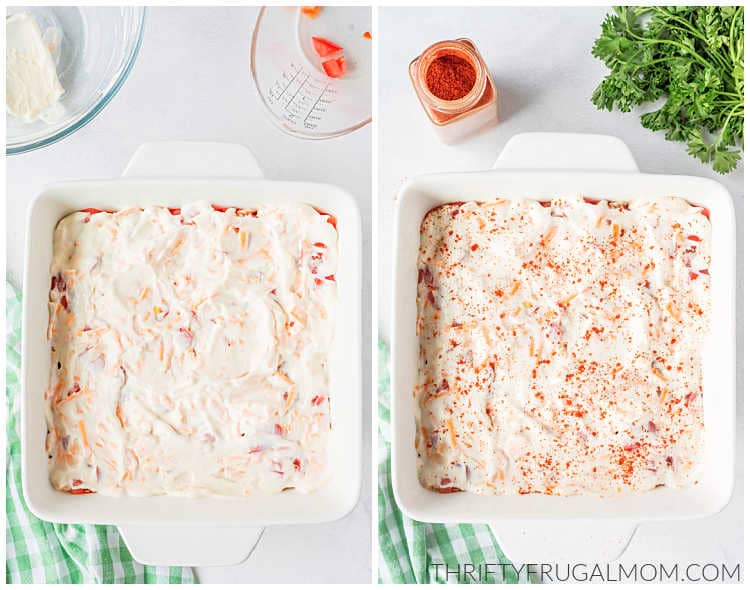
STEP 6: Then pour on the sour cream mixture; smooth into an even layer. Sprinkle with paprika.
STEP 7: Bake for 25 to 30 minutes and serve!
What Should I Serve with a Bisquick Beef Casserole?
This simple dinner recipe is perfect like it is, but if you want to serve it with a side here are some suggestions.
- Instant Pot Refried Beans
- An easy dinner salad
- Tortilla chips and salsa
- Cooked vegetables like peas, corn, green beans or broccoli
- Seasoned black beans
- Spanish or Mexican rice

You May Also Enjoy These Easy Dinner Recipes:
- Bisquick Chicken Alfredo Bake
- Crockpot Tamale Pie
- Herb Roasted Chicken and Potatoes
- Easy Bisquick Chicken Pot Pie
- Oven Ready Lasagna (no boil!)
12/28/21: This recipe was originally published on my site under the name Deep Dish Taco Squares. I updated the article with new photos and changed the name of the recipe to better reflect what this casserole actually is.

John Wayne Casserole
Ingredients
- ½ lb. ground beef
- 2 Tbsp. onion, chopped
- ½ c. sour cream
- ¼ c. mayonnaise
- ½ c. shredded cheddar cheese
- ¼ tsp. garlic powder (see recipe notes)
- 1 c. Bisquick (link to homemade Bisquick in recipe notes below)
- ¼ c. cold water
- 2 tomatoes, diced- more if preferred (see recipe notes)
- paprika optional
Instructions
- Brown ground beef and onion.
- Mix sour cream, mayonnaise, cheese and garlic powder. Set aside.
- Combine Bisquick and water to form soft dough. Press into the bottom of a greased 8×8 baking dish. (It helps to make your hands slightly damp to do this!)
- Top with cooked ground beef then the tomatoes, then the sour cream mixture. Sprinkle with paprika if desired.
- Bake at 375° for 25 to 30 minutes.
Notes
- Tomatoes: 1 (15 oz.) can of drained diced tomatoes can be subbed for the tomatoes- just be sure to drain them really well!
- I love using my Homemade Bisquick Mix recipe.
- Garlic Powder: can substitute with 1 tsp. jarred minced garlic or 1/2 tsp. granulated garlic.
- Doubling Recipe: You can easily double this and make it in a 9 x 13 baking dish instead.
- Additions: feel free to add in corn, green chilis or peppers. If adding peppers, fry them up with the ground beef and onion


Lydia Locke
Making freezer meals for my parents. Should I bake, cool & then freeze? Then thaw & reheat? I’m worried about the dough base if I don’t cook before freezing.
Lydia Beiler
So thoughtful of you to make freezer meals for your parents, Lydia! To be honest, I haven’t ever frozen this casserole because I was always concerned the crust and sour cream mixture may not hold up well (the sour cream may get more runny). But I did a bit of research and it appears like other have baked it, frozen it once cool and then reheated with good success. I’d love to know how it goes if you try it!
Ps. Sorry for the slow reply- had family visiting for a week and got behind on business things!
Amanda Karlin
I have not made this yet, but it sounds delicious! Was wondering if I could make it in be morning before work and put it in the fridge until my husband can pop it in the oven?
Lydia Beiler
Sorry for the slow reply…I took a bit of time off over Christmas. I think that might work. The only risk would be that the crust/bottom may get a bit soft. Although I suspect it wouldn’t be a problem.
Chasity Gosnell
Can this be made and frozen before cooked?
Lydia Beiler
I haven’t ever tried it but someone just told me recently that they do it and it works fine. Just let it thaw completely before baking.
Valerie
This recipe inspired me to create my own version. Here it is!
Thank you for creating this amazing meal plan! This was the first recipe I wanted to try, but then realized that my Aldi did not have the baking mix. So this recipe became the inspiration for something slightly different. (I am calling it Cowboy Cornbread in my recipe book). It turned out great! Here is what I did:
I found a comment here, where a reader was trying cornbread instead of baking mix. I had a box of Jiffy Corn Muffin mix on hand, so I used that as a top crust, and made a layered meat filling, layering the ground beef, 1 can tomatoes (Rotel style), 1 can kidney beans (rinsed and drained). I sprinkled generous seasonings on top of the beans before spreading the cornbread batter on top. I baked at 375-400 for about 30 minutes in an 8×8 glass pan. I served it with Caesar salad. It was a hit.
The slight spiciness of the chili meat filling, was a perfect contrast to the sweet cornbread. So yummy! Even though I went way off course making this recipe, I’m so grateful. Your organization skills are off the charts! I was in need of a meal plan, and lately it’s been hard to find meals that both my teenagers like to eat! My son does not like anything gooey or cheesy or creamy, so I decided to omit the sour cream/mayo layer this time.
I still plan to try the recipe as written, and I have all the ingredients for another batch, thanks to your shopping list! This would also be yummy with sliced jalapeños in the filling!
Thanks again & Merry Christmas to you and yours!
-Valerie in Michigan
Lydia Beiler
Your version sounds amazing, Valerie! And I love that you made things work with what you had. Yes, I think Aldi stopped carrying the baking mix and I’ve been trying to figure out what to do for the meal plan as it’s a bit complicated to change things out. I suppose I should maybe at least update it to say that the baking mix will need to be bought elsewhere. It’s just a bit tricky to do that.
Bonnie Meinders
I used biscuits already in the can