Thank you Floor & Decor, TheRTAStore.com and Steph Stolzfus Design for sponsoring this post. All opinions are totally my own.
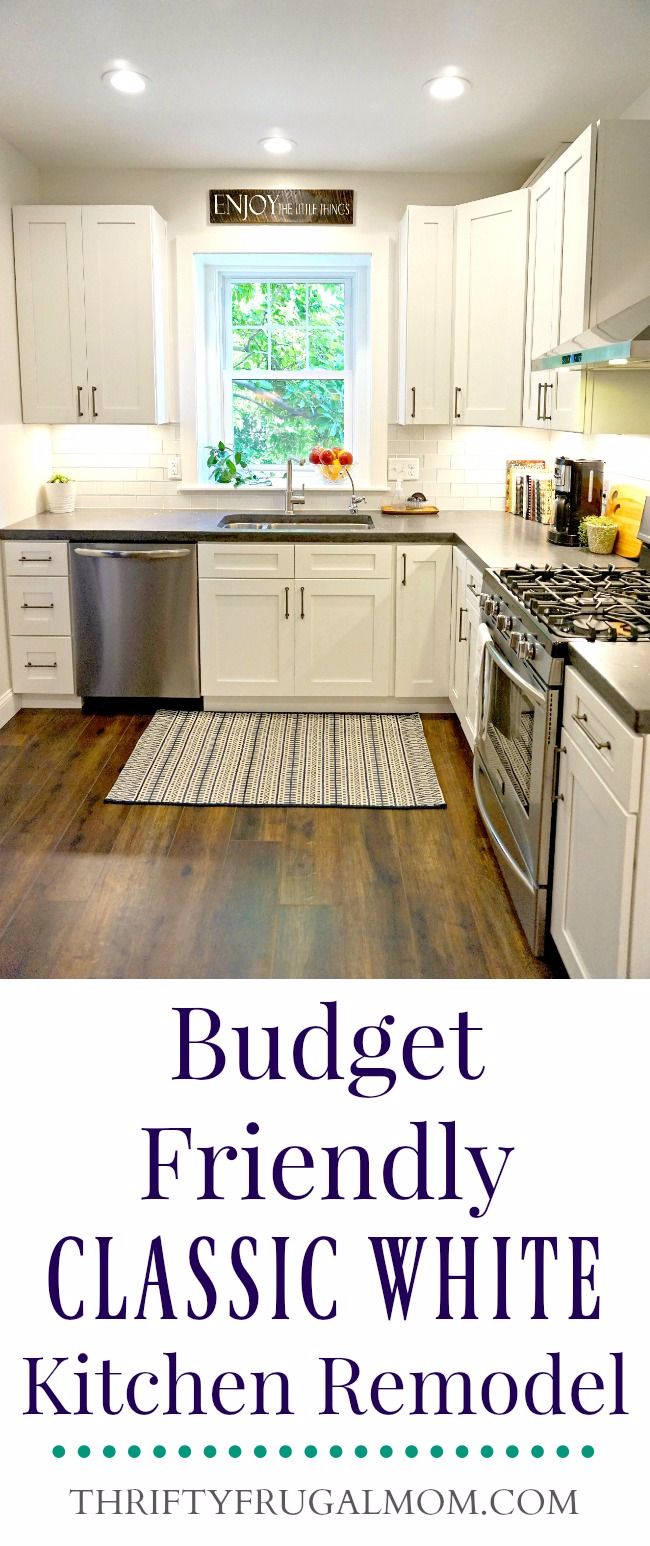
Get all the details on our frugal kitchen remodel! Learn how we saved money and were still able to create a beautiful classic white kitchen.
There are affiliate links in this post – please read my full disclosure policy.
I’m so excited to finally be able to show you our finished budget-friendly kitchen remodel! I know some of you have been patiently waiting on this post….thank you for being so patient!
I hadn’t anticipated making you wait quite so long, but some of the last minute details took longer to do than we had anticipated. Isn’t that the way remodels always go though?
Before I get into the pictures and details of the new kitchen, let me give you a little bit of background.
Kitchen Remodel on a Budget
THE INSPIRATION
My husband and I have both kind of fallen in love with the recent trend of simple, more neutral style and decor. We love how clean and fresh it looks and how uncluttered it can feel.
So pretty much as soon as we decided that we were going to be moving, I knew that I wanted to incorporate this look and feel into the decor at our new house. The kitchen at our previous house was red and to be honest, I was quite tired of the color and was very ready for something more simple and basic looking.
As a result, when we were planning this kitchen remodel, we went with a very neutral color palette of white and gray. I love how fresh and bright it feels! And the great thing is, we can always change the accents to give it a whole new look without a lot of hassle.
Currently, I’m adding interest by including some wooden items, plants and a bit of blue here and there. Why blue? Well, I always find myself gravitating toward blues, especially darker shades, so it just made sense to me to incorporate that color into the decor here at our new place.
THE CHALLENGES
As I mentioned in my previous Kitchen Remodel: before pictures and inspiration post, I love working in my kitchen and it’s kind of my happy place, so creating a functional kitchen with a decent amount of both work space and storage space was pretty important to me!
But because of how small the space is (approximately 9 ft. x 14 ft.) and even more because of the layout (specifically the two doorways and an oddly placed refrigerator), it ended up being more of a challenge than we anticipated!
We were on a tight timeline and trying to keep our expenses to a minimum, so we didn’t want to do any major structural changes like move doorways or walls.
That obviously meant that we needed to work with the existing layout and I’ll be honest, there were times that I was sure I was going to end up with a kitchen that I hated!
But after lots of brainstorming and playing around with our options, we were able to come up with a layout that I felt good about. I think we did a pretty good job of making the best of what we had to work with and really, it’s ended up working out pretty well for us!
Is it my dream kitchen? Not really. Would I love a kitchen that was a bit bigger? To be honest, yes, I miss the big kitchen that I had at our previous house and it would be really nice to have that layout back some days!
At the same time, I’m very grateful for the kitchen I have and am happy with how it turned out. In all reality, we are rich and so very blessed compared to most of the world.
Having a kitchen that’s a bit smaller than I would like is really quite a first world problem and a problem that I’m very much privileged to have, if you know what I mean.
I recently was so challenged by this book and the perspective that the author gives really has helped me love the home I have, even with its quirks and imperfections. It was a good reminder for me!
Anyway…off my soapbox and on to the kitchen details! 😉
In case you forgot, here’s how the kitchen used to look.
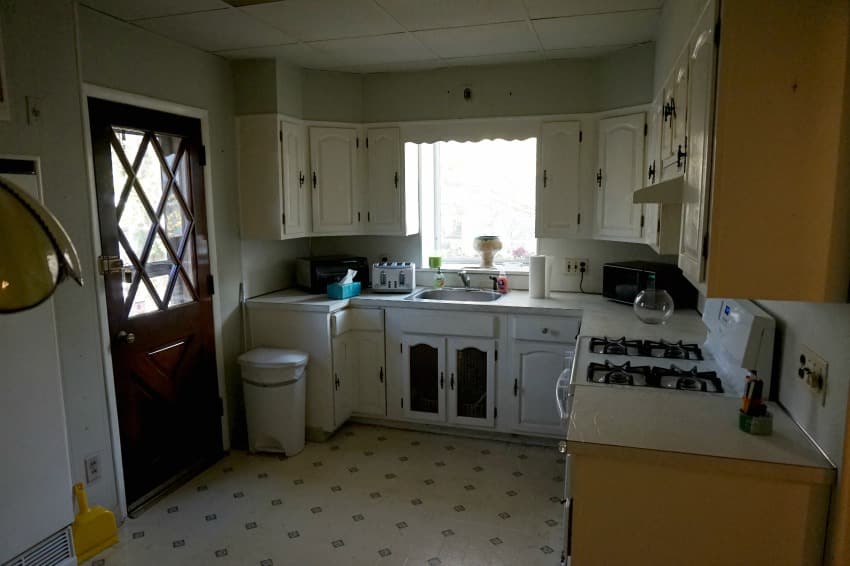
The “work” side of the kitchen allowed for very little actual workspace unless you never have any dirty dishes. Unfortunately, that isn’t the kind of world that I live in! 🙂
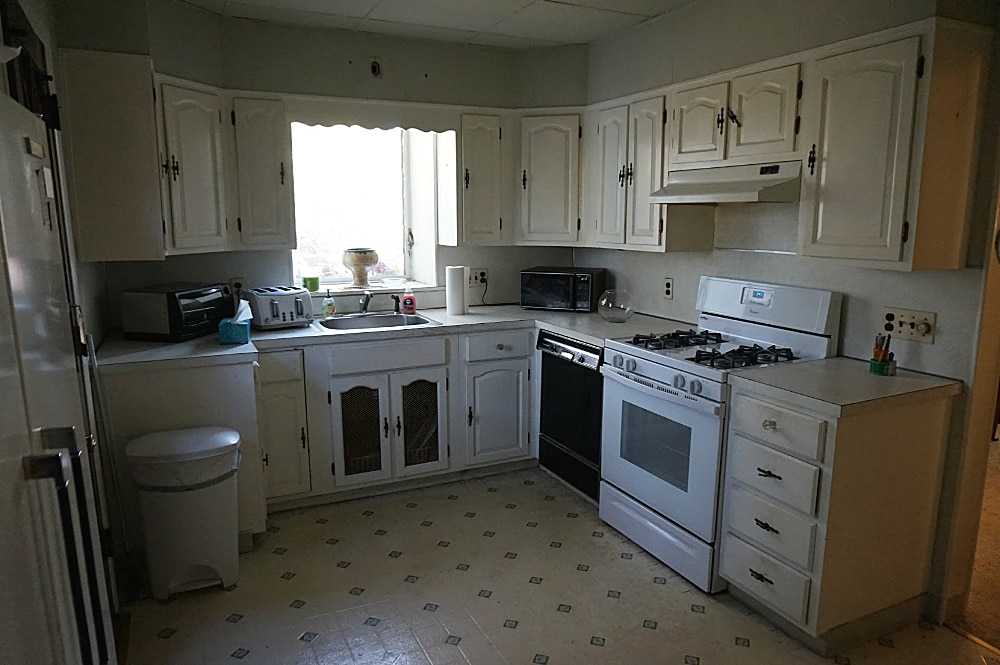
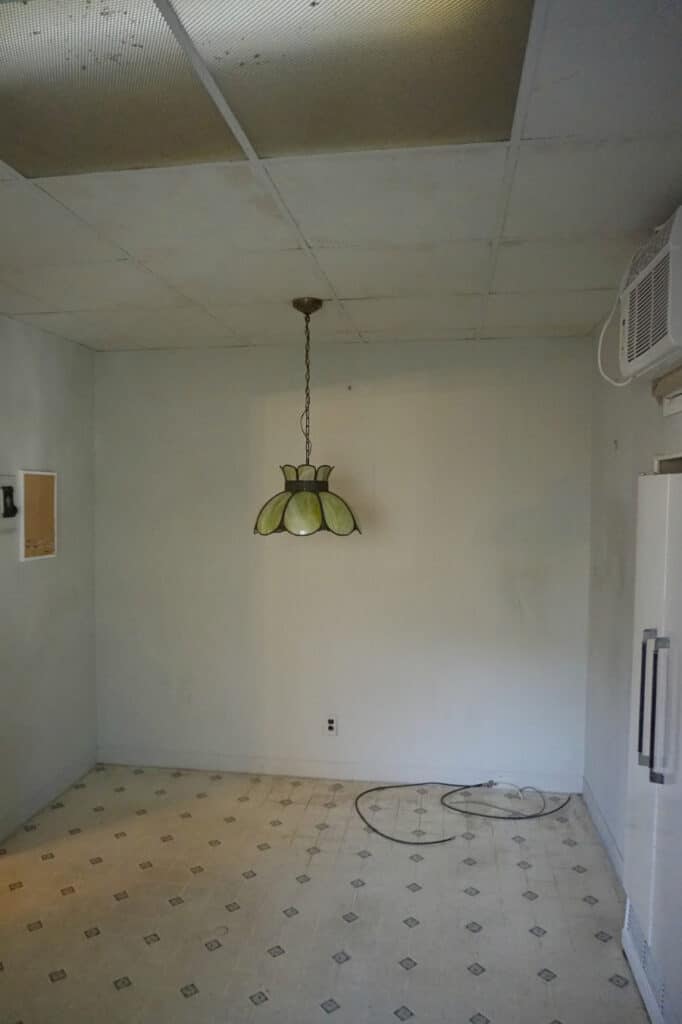
The other side of the kitchen was used as a little eat-in area, which we didn’t really need since we have a nice big dining room right beside our kitchen. Oh, and please take note of the dropped ceiling and fluorescent lighting.
The bulbs for that light were up about a foot and since they were the only light in the kitchen except for a tiny light above the sink, the kitchen was dreadfully dark!
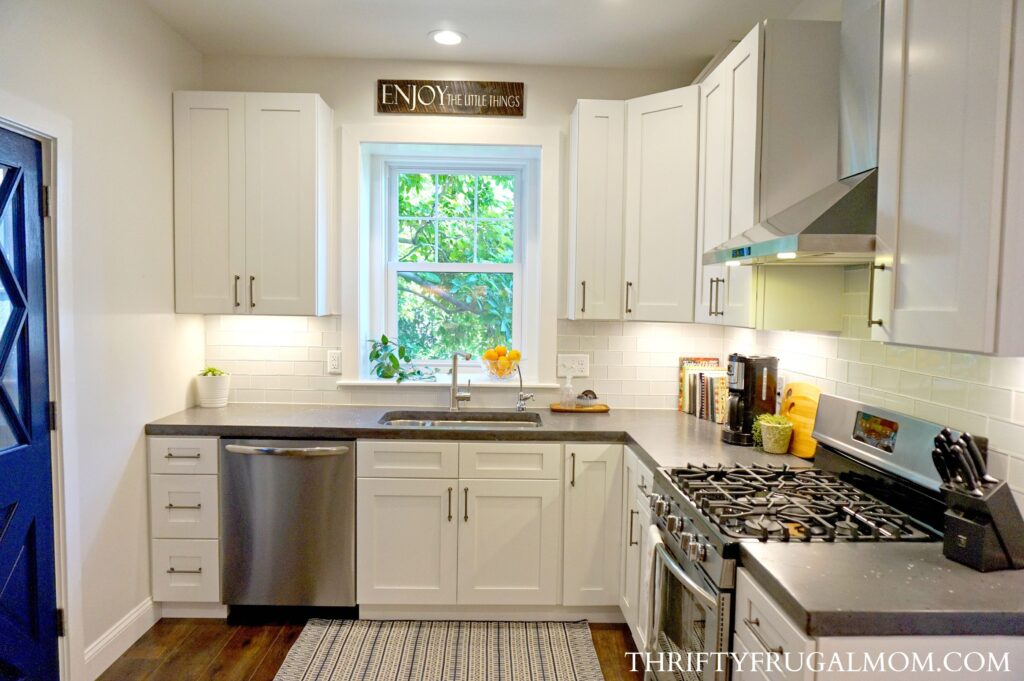
And here’s how it looks now!
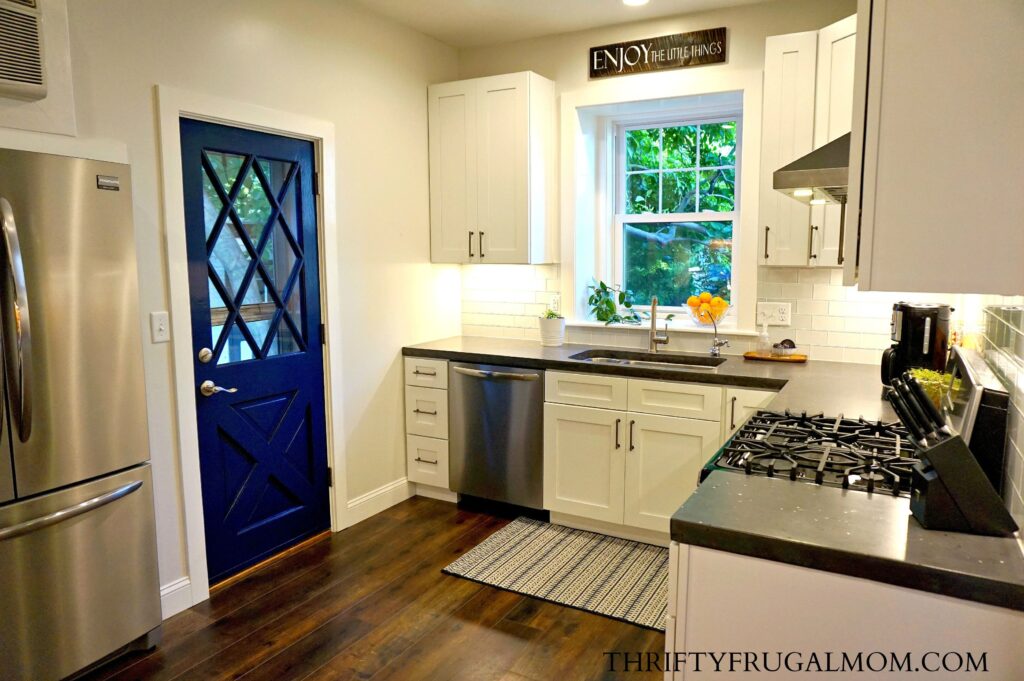
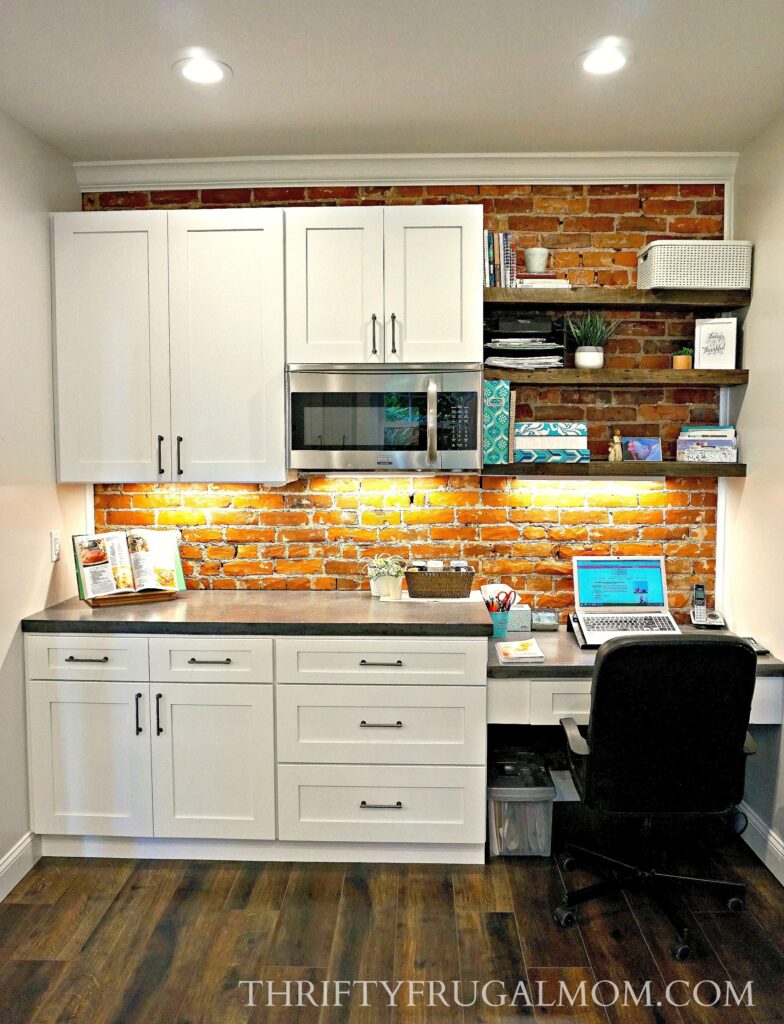
Such a big difference, isn’t it?! I only wish that I would have thought to take some close-up pictures of the old kitchen so you could truly see the bad shape that it was in!
Somehow, I think it would help you appreciate the transformation even more!
ALL THE DETAILS
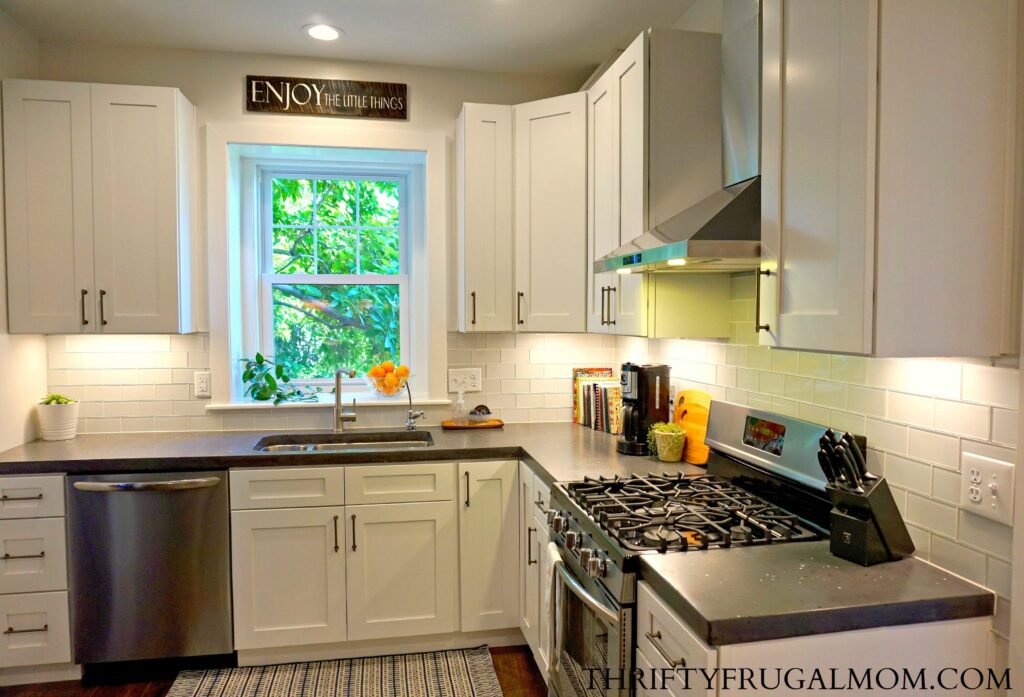
We went with ready to assemble Aspen White Shaker Cabinets from TheRTAStore.com and so far I’m loving them! Working with The RTA Store was such a dream because they had a designer that was able to help us work on our kitchen design for free. It was awesome!
Their designer gave such helpful tips, created realistic computer-rendered images of what our kitchen would look like, and more. It took such a load off of me and helped reduce my stress level immensely. You can read more about the process of working with The RTA Store here.
I’m a big fan of white cabinets and knew that’s what I wanted from the start. I know some people are scared of going with white cabinets, but I had them at our previous house too, and learned that even with four kids, it’s really not that hard to keep them clean.
Yes, they do show smudges and dirt more quickly than dark cabinets, but I actually like that because then I know they are dirty and can clean them up.
And if you just make wiping up any dirt you see a daily habit that you do when you wipe up your counters after meal prep, it’s really a cinch to keep them clean for the most part.
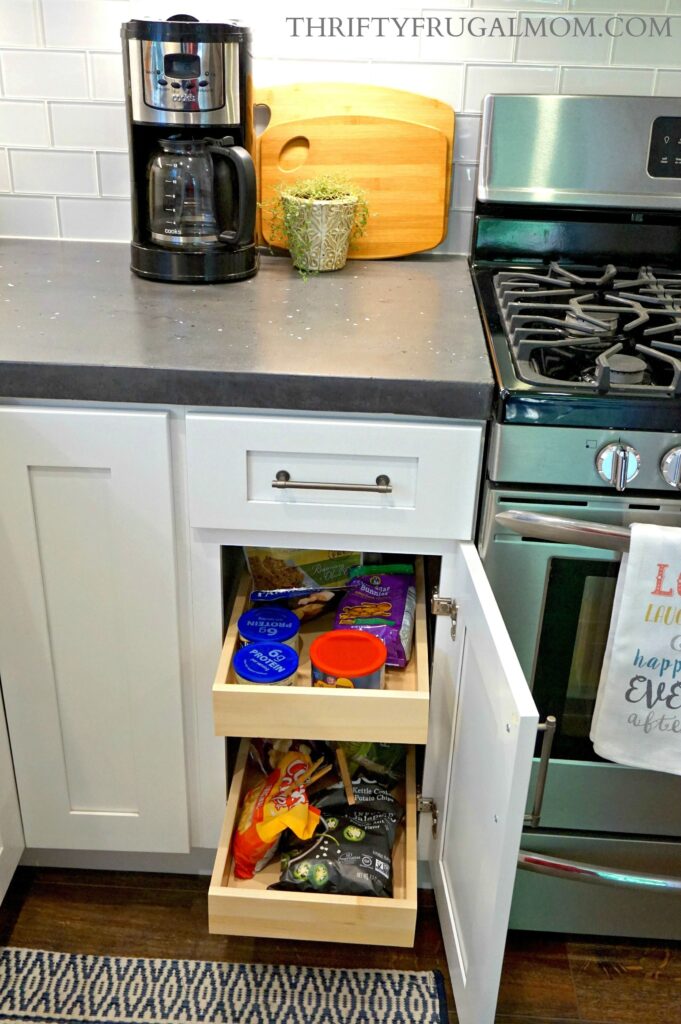
One thing that I knew that I wanted for sure was roll-out trays my cabinets instead of just plain shelves. It makes it so much easier to get to things and was well worth the extra cost.
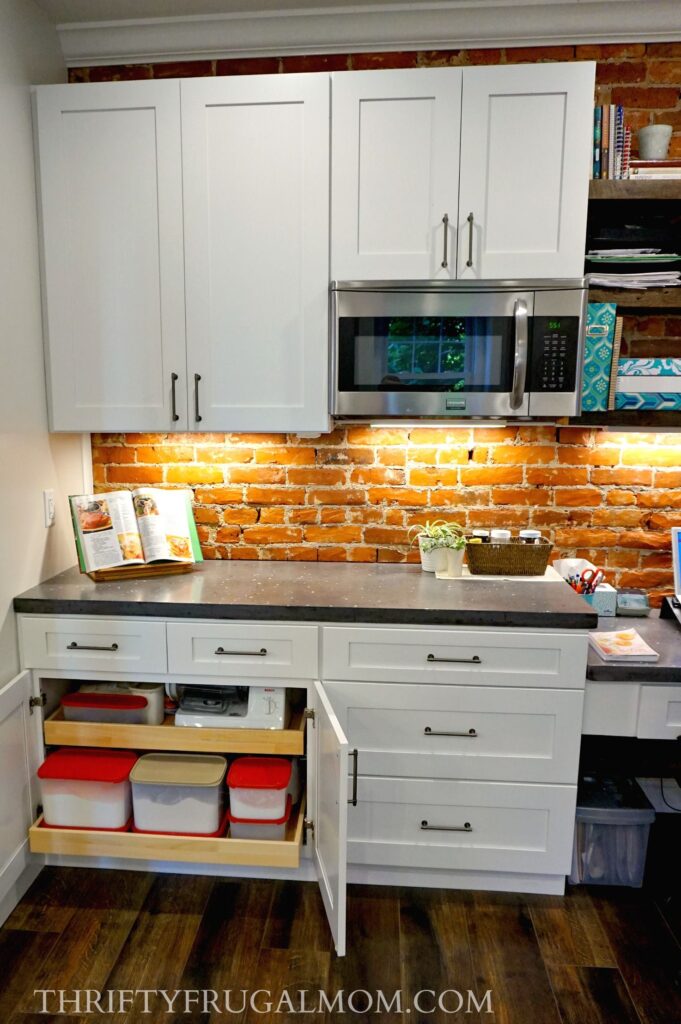
In the “work area” side of the kitchen where I do most of my food prep, on the lower half of the cabinets I went with one set of cupboards with roll-out trays and one set of just drawers.
The roll-out trays work well for holding my beloved Bosch mixer/blender and Tupperware Modular Mates that are filled with my favorite basic pantry staples like flour, sugar, brown sugar etc. And the big drawers are perfect for things like mixing bowls, casserole dishes and smaller dishes and containers that I use for leftovers.
The exposed brick “backsplash” here was not in my original kitchen plans. I was figuring we’d do the same glass tile that we used on the other part of the kitchen.
But we were exposing brick in some other parts of the house and I apparently wasn’t clear in my communication and my husband, who did most of the grunt work on the remodel, understood that I wanted this wall exposed too.
I was pretty shocked the day that I walked in and saw this whole wall down torn down to the brick! He convinced me to keep it and I ended up liking the character it adds, and of course, it was a cost saver too!
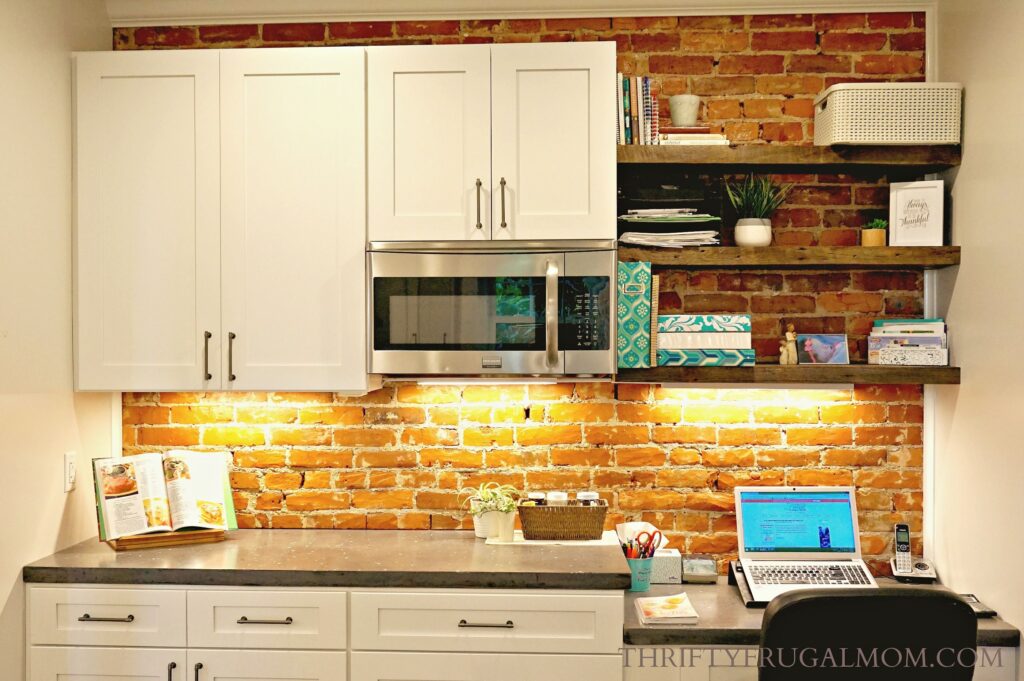
We were initially thinking that we’d go with a microwave cabinet shelf for the microwave, then my husband had this brilliant idea to buy an over-the-range microwave and just install it directly to the cabinet above instead.
Since this eliminated our need for a shelf it helped lower the cost of our kitchen cabinets. Plus we bought our appliances as a bundle during a Black Friday sale and the microwave that was part of the bundle was an over-the-range version.
So if we had gone with a shelf, we would have needed to also buy a microwave separately. I’m so glad we did it this way and I absolutely love it because it means that I don’t have a shelf to constantly worry about keeping clean! I also think it visually looks nicer too.
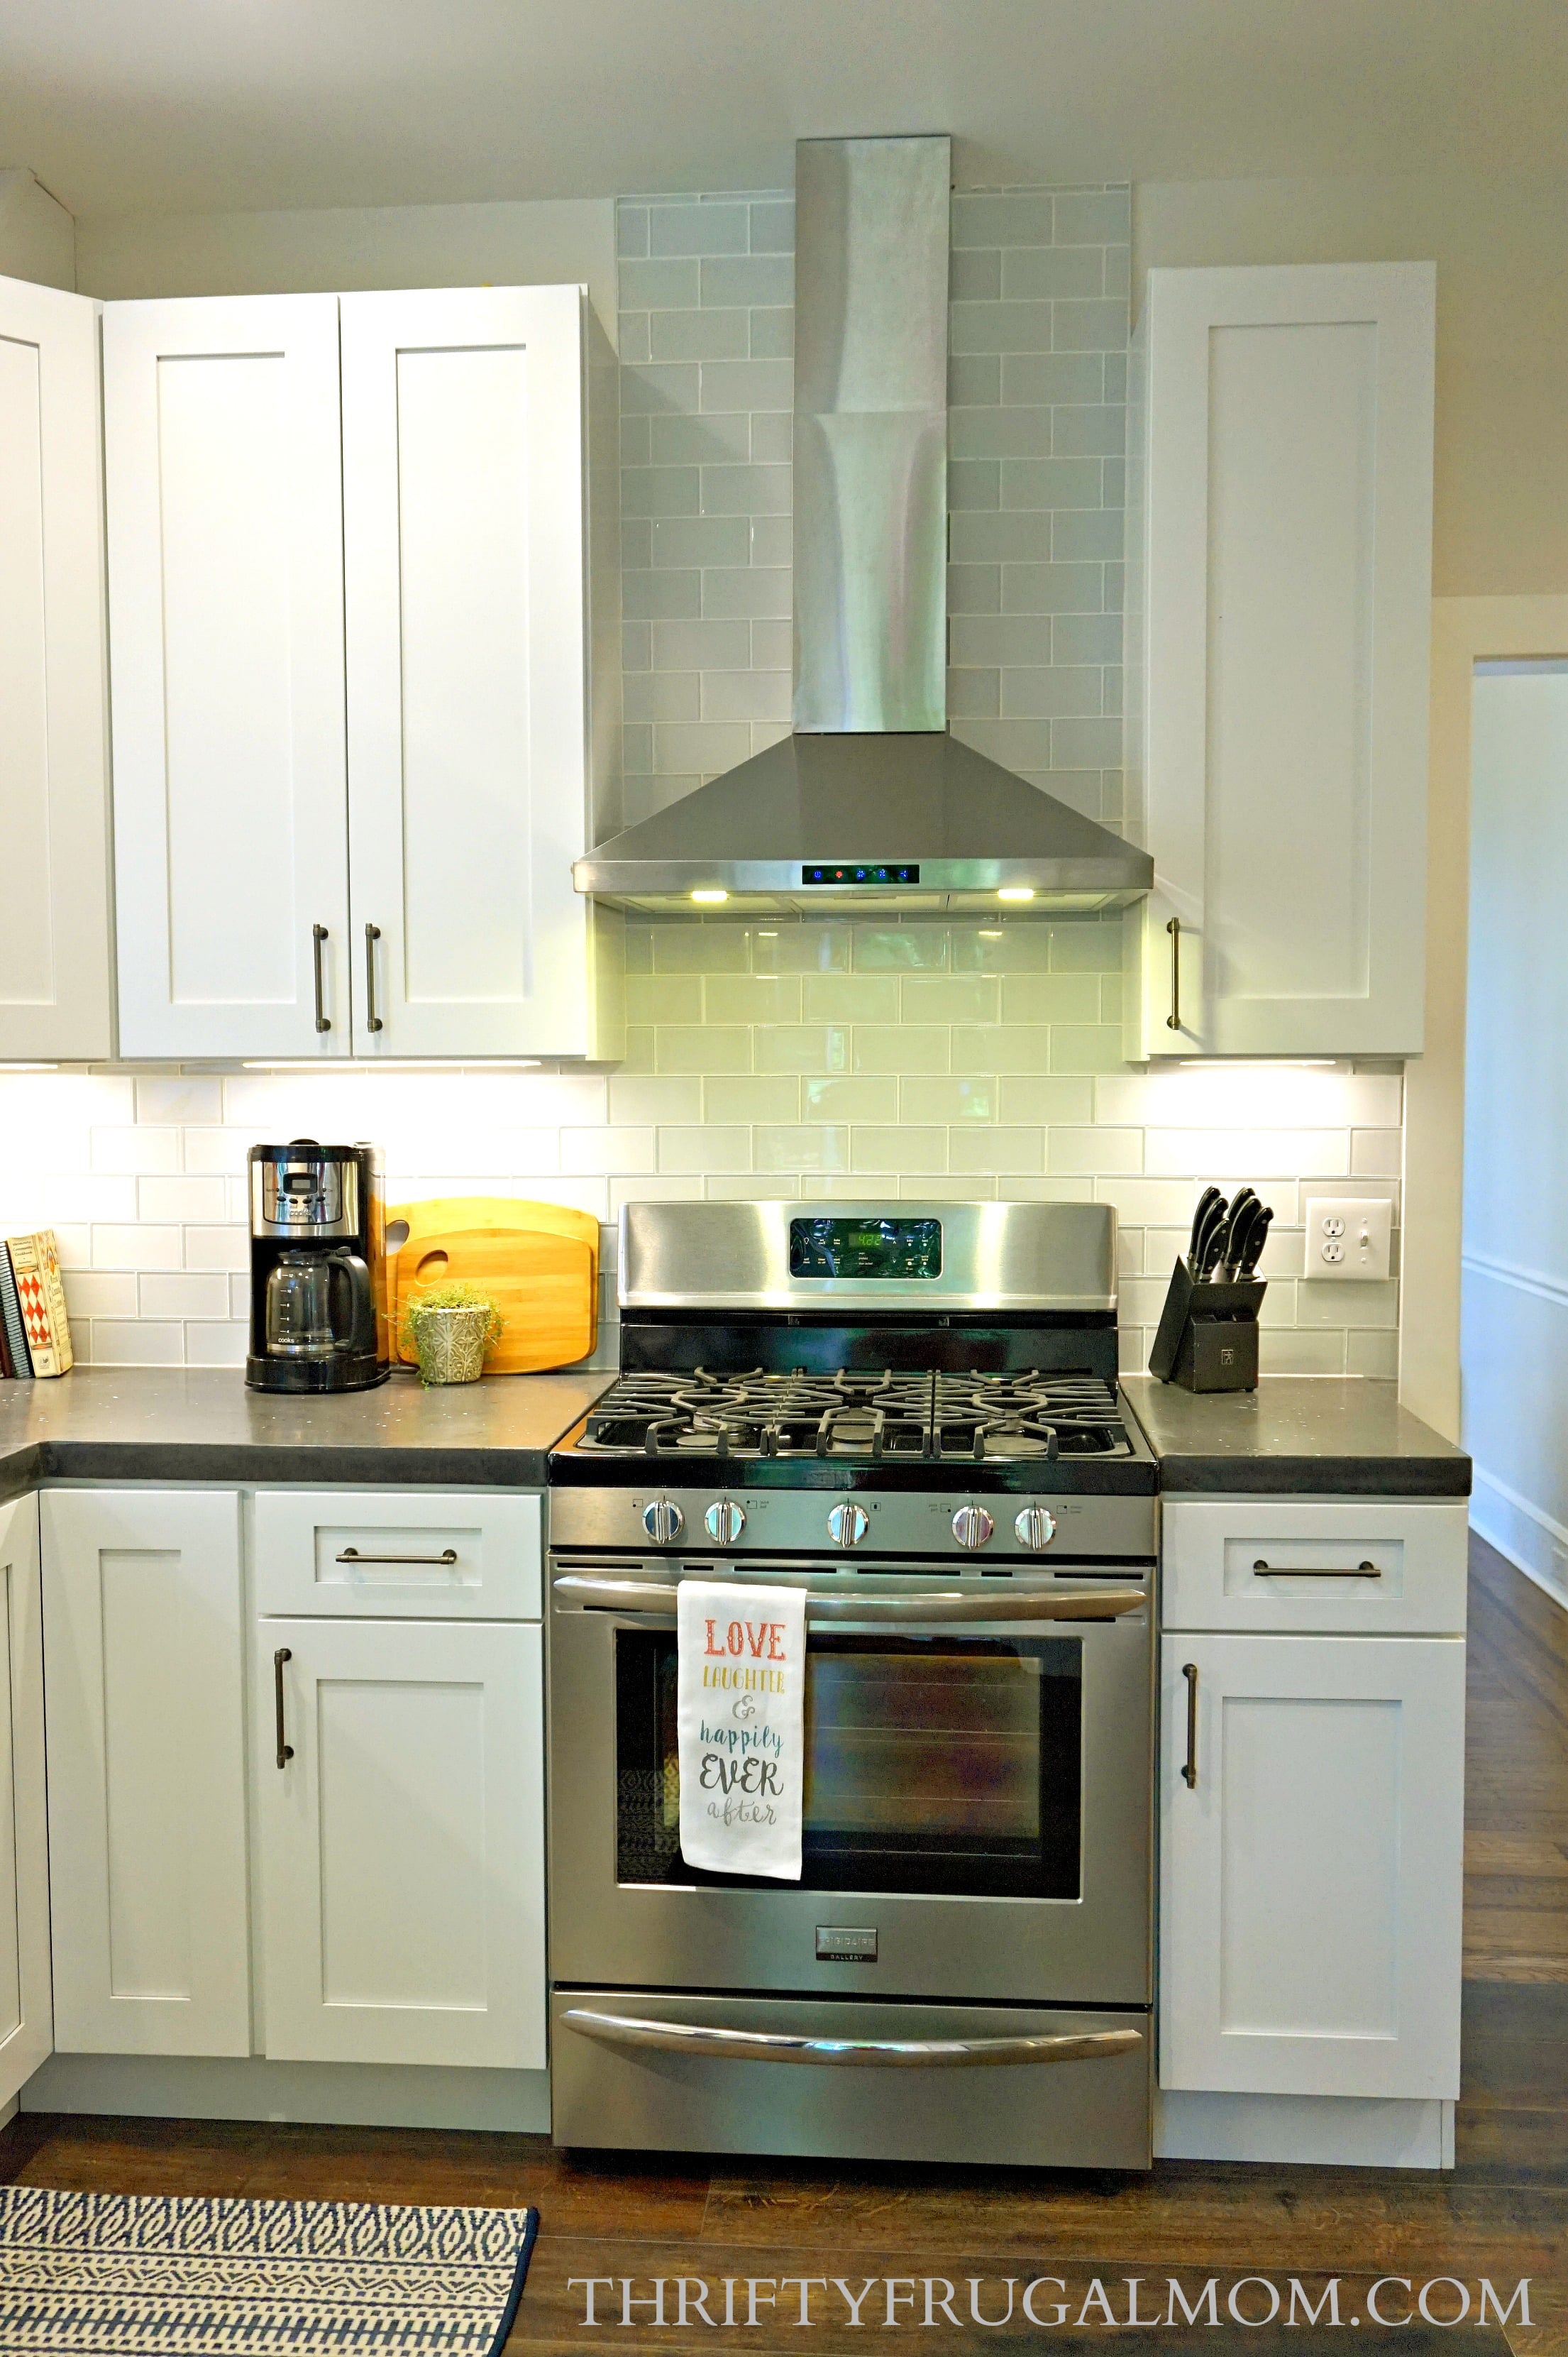
When I was brainstorming ideas for our kitchen, it didn’t take me long to figure out that I wanted this style of stove hood. But it did take me a bit to find one that didn’t completely bomb our remodeling budget!
Amazon came to the rescue though and I ended up going with this decently priced stainless steel stove hood after seeing it in another blogger’s kitchen remodel.
It’s perfect and I love how it helps make our kitchen feel a bit more open. I was pretty happy to accomplish that without needing to go with any open shelves.
It’s not that I don’t like how open shelves look- I do! But they simply aren’t for me. I’m just not into all the dusting and trying to keep things always looking nice that goes along with them.
Plus, with our kitchen being on the small side, I felt like I needed all the cupboard space I could get!
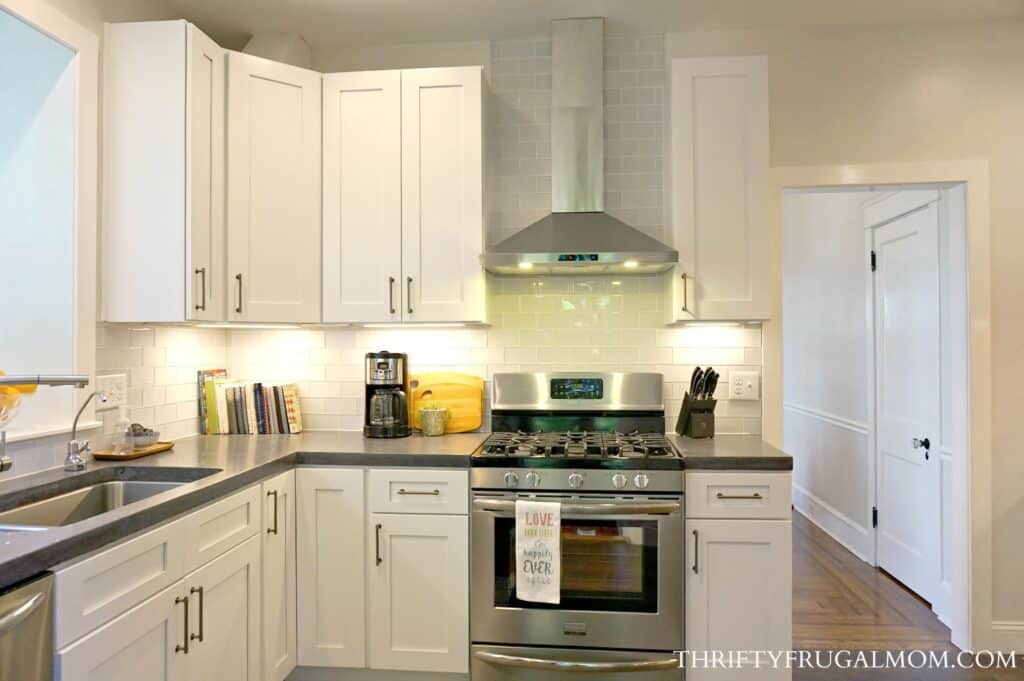
We’ve gotten so many compliments on the Pure White Shiny Glass Tile backsplash that we got at Floor & Decor.
I chose the glass tile because I wanted something simple, yet a little different too. And I love the interest that the glass gives! It’s been super easy to clean up and keep nice and I have no complaints at all.
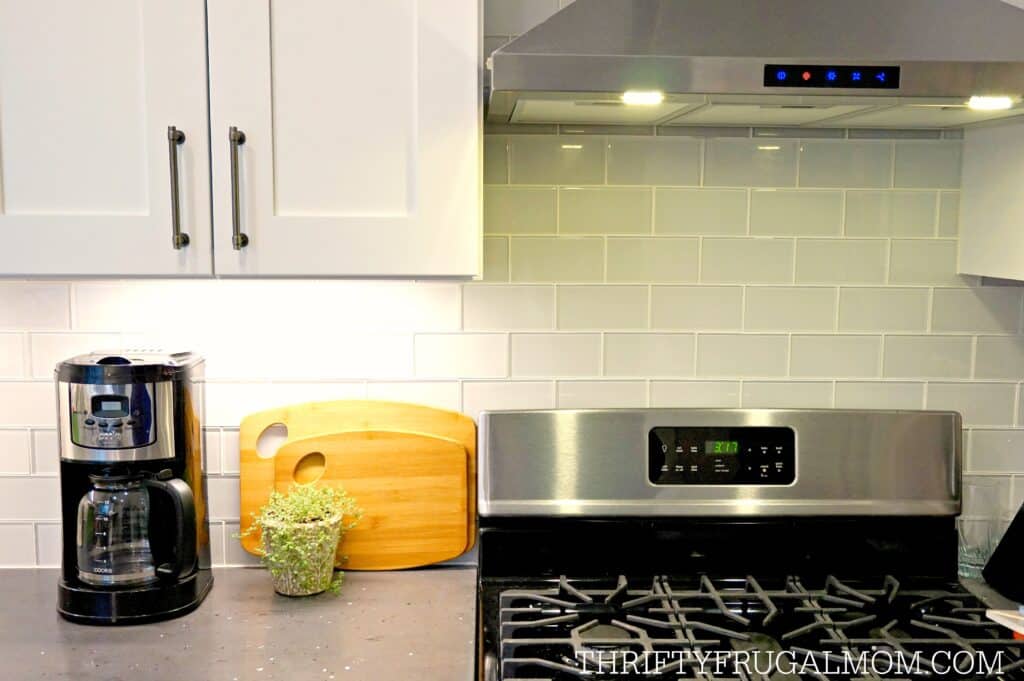
Full disclosure though…I should mention that if you go with glass tile, be aware that it can look slightly different depending on the other colors you have nearby.
When I looked at the tile in person at the store and at the pictures of it on Floor & Decor’s website it looked much more white. So when I first saw it installed in our kitchen, I was surprised to see that it didn’t look very white at all and initially was pretty disappointed!
It grew on me though and I really like it now and feel like it actually pulls the kitchen together nicely.
I also learned after doing some research that this is apparently a pretty common problem that people run into when they use glass tile- the whole thing of it changing colors a bit. So I just wanted to be sure to mention it and would recommend just getting a few to give it a try first if you decide to go with glass tile.
I’d hate for you to be mad at me because it didn’t look like you expected! 🙂
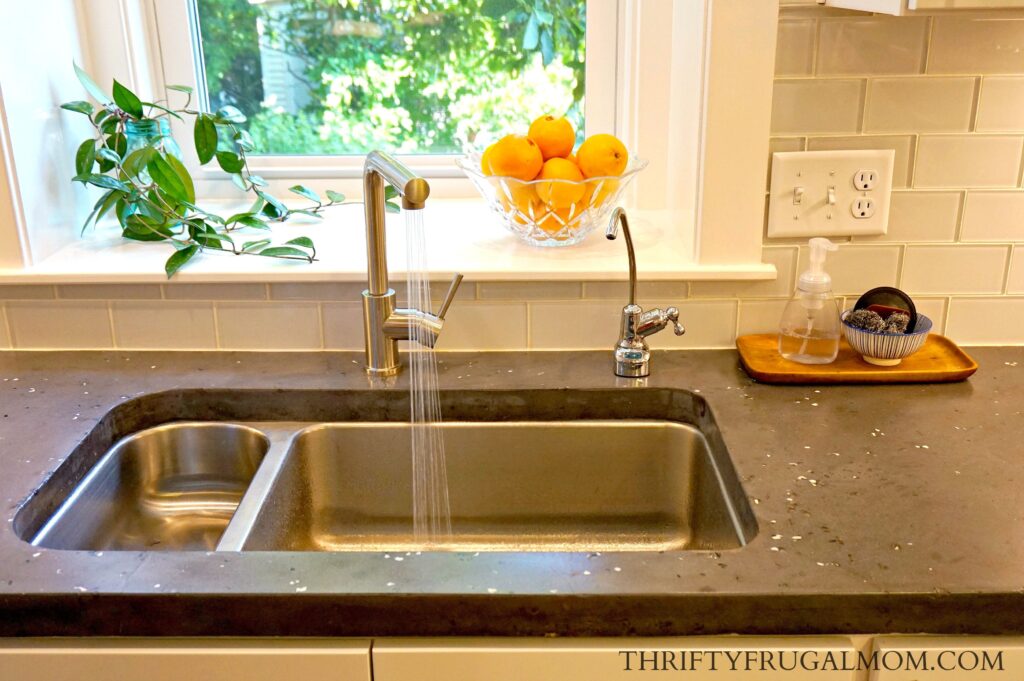
I’m sure many of you find my choice of sink boring. 🙂 That’s okay though because I love it!
I had a sink just like this in my kitchen at our previous house, and when we first moved in there I was sure I would hate it because the one side is so small. But I surprised myself and ended up liking it more than any other sink that I’ve used!
The larger side is so handy for washing and dealing with big kettles etc. And the extra-large and extra small proportions of the two sink compartments just works well with my method of washing dishes.
Initially, I had hoped that I could find an apron front sink that had these proportions, but when none turned up we just went with this basic one, and in the end, I actually think I like how it looks better anyway.
And I love our faucet! I wanted something simple and sleek looking and this fit the bill totally. Plus the design makes it effortless to get big things in and out of the sink easily without hitting the faucet. I also really like that it has a pullout sprayer too. I find that I use it way more than I ever did when we had a sprayer separately.
See that small beverage faucet on the right? We have city water and if you’ve ever had city water, you know that it can taste pretty bad sometimes, not to mention the fact that it has chlorine in it and isn’t really the best for you.
We are big fans of reverse osmosis water filtration systems and have found that by using one we can have great tasting water very easily! They’re fairly inexpensive too and the filters last forever.
A tip about water filtration systems: The plumber that installed our drink faucet and filtration system for us at our previous house told us that the filters are almost always good way longer than the system says they are.
He said that he uses his filter even after the light comes on that says you should change it and doesn’t bother actually changing it until the water starts to come out more slowly than normal. That’s been a huge money saver for us and I thought it might be helpful for any of you that use one of these systems.
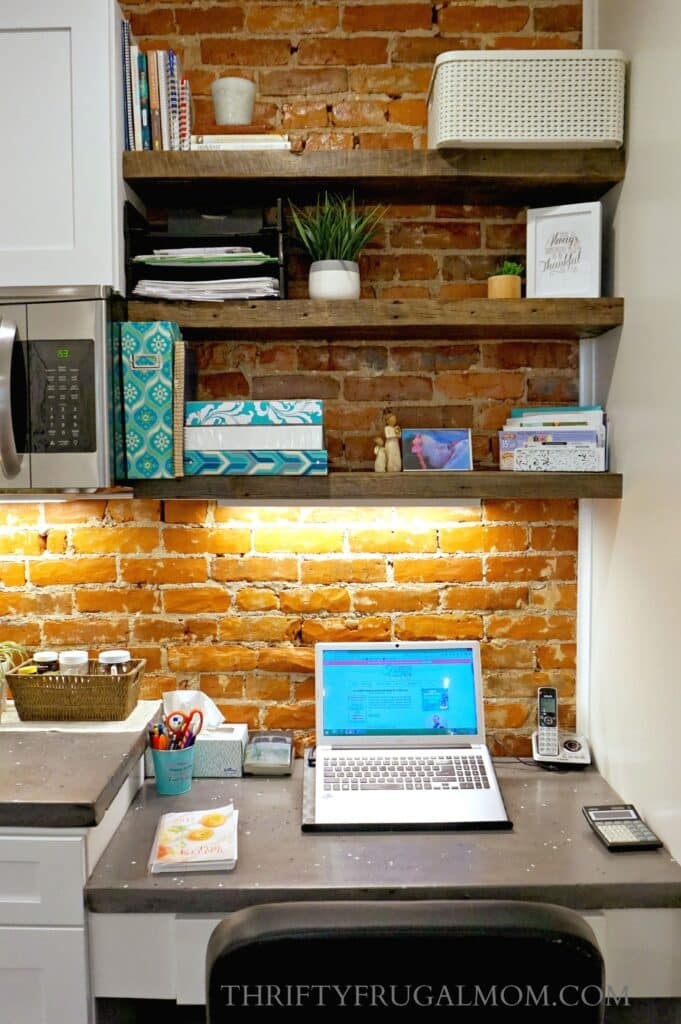
A desk area was one of my biggest requirements for our new kitchen. Our previous house had one built into the end of the kitchen and I became so spoiled by it! I’m in my kitchen so much that it just makes sense to have a desk there, especially because of my blogging.
I love that I can keep track of things that are cooking or baking while still working on blog stuff, our grocery budget, emails, online shopping etc.
And don’t you just love those floating wood shelves? My talented husband used some old scrap wood that he had lying around to make them for me. I was so impressed!
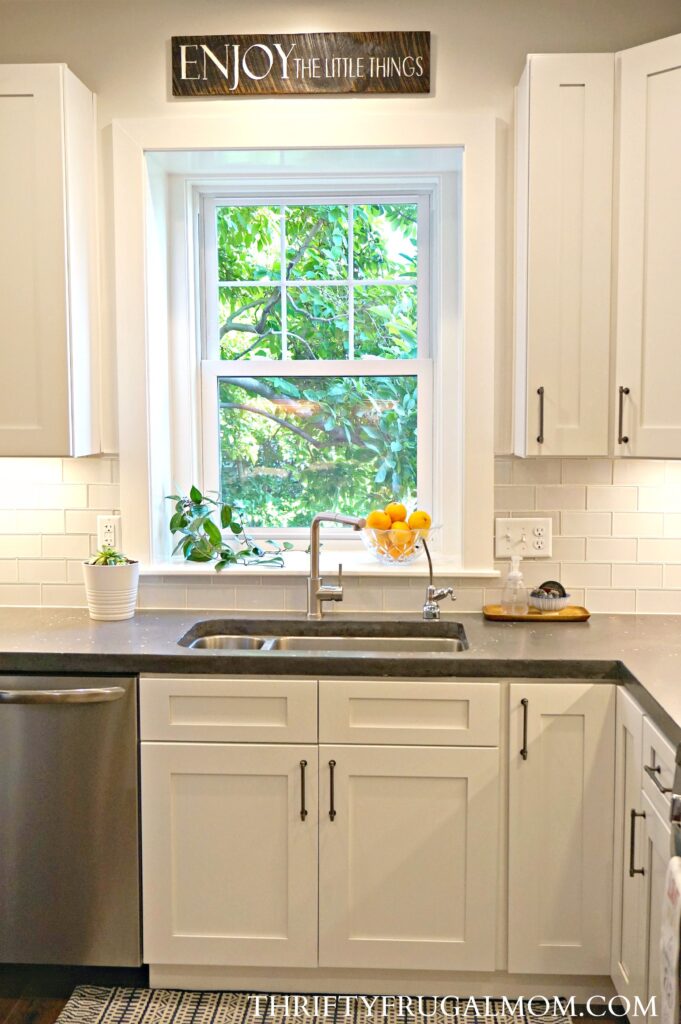
I about gave up on finding a rug that I liked for our kitchen. I wanted something that was darker blue, fairly simple and easy to keep clean. I know, I’m not picky or anything. 🙂
I finally came across this indoor/outdoor rug at Target and thanks to my Target RedCard’s free shipping, had it shipped to our house at no extra cost! Don’t you love the convenience of shopping at home?!
I loved the rug the moment it arrived and it feels like the perfect fit for this space. I haven’t used an indoor/outdoor rug before, but I’ve already appreciated how easy it is to spot clean with just a wet rag.
They are also supposed to be super easy to just spray off when you need to clean them well. So far, I’m sold!
And see that beautiful sign above the window? I had it custom-made by the talented Steph of Steph Stolzfus Design. I had an idea of what I wanted for that spot but was having a really hard time finding anything that worked.
I’ve admired Steph’s signs for a while now and love that she offers beautiful pieces at reasonable prices, so I finally contacted her to see if she could make my idea a reality. And she totally did! She was super easy to work with and did such a lovely job.
I chose the words “Enjoy the little things” for the sign because I feel like I need that daily reminder!
My tendency is to be task-oriented and so often I forget to stop and just take time to breathe and enjoy the little things about my day or the little things around me. When I do though, noticing the details often brings me so much joy!
So having this sign in a spot where I’ll see it often is one of the ways that I’m trying to help myself be more intentional about choosing to slow down a bit and enjoy the little things.
And for those of you that are curious about cost, we did our budget-friendly kitchen remodel for under $10,000, including the appliances.
Unfortunately, we didn’t keep meticulous track and since we were doing a full house remodel, some expenses kind of blended with the expenses that we had for other parts of the house, so it was hard to get an exact cost.
But my best estimate is that it cost around $9,000 total- an amount that we were very happy with!*
We are enjoying our new kitchen and are so grateful for it! I hope that it can give you some inspiration and ideas for making your own kitchen into a space that you can love and enjoy!
*Our cost was actually less than this because of my partnership with Floor & Decor, TheRtaStore.com and Steph Stolzfus Design, but this is what it would have cost without the discounts that we got as a result of that.
THE SOURCE LIST
//MAIN KITCHEN ITEMS//
Flooring | Floor & Decor
Tile for Backsplash | Floor & Decor
Kitchen Cabinets | The RTAStore.com
(Read more about our experience designing our kitchen and using TheRTAStore here.)
Cabinet Hardware | Amazon
Appliances (Frigidaire Gallery) | Home Depot
Stove Hood | Amazon
Sink | Amazon
Faucet | Amazon
Drink Faucet (reverse osmosis water filtration) | Amazon
Counter Tops | Concrete, made by a friend
Wood Shelves at Desk | made with scrap wood by my husband
Wall Paint Color | Benjamin Moore Classic Gray
Trim Paint Color | Benjamin Moore Snowfall White
Door Paint Color | Behr Very Navy
//DECOR//
Enjoy the Little Things Sign | Steph Stoltzfus Design
Navy and White Rug | Target (no longer available, but they do have some similar navy rugs)
Printable on Desk Shelf | Daisy Cottage Designs
Small Basket | Marshalls (available on Amazon)
White Plant Pots | Ikea



Alex Sutton
I love how your kitchen turned out! It’s so bright and welcoming! I never would have guessed that your kitchen remodel was done on a budget. I’ve been wanting to renovate our kitchen, but have been worried about it being outside of what we can spend, but I will definitely be taking a look at all of the links you posted and trying to do something similar. Thanks for sharing!
Lydia Beiler
Thank you, Alex! It’s amazing how much creativity and a little determination can save. I hope you can are able to get that remodel done without spending loads!
Megan Sucher
This is so beautiful! These are exactly the cabinets I want, but I’m curious if they are a bright white or an off white? We have white appliances ? that we won’t be getting rid of, so I don’t want it to look tacky. I’m having a hard time finding bright white on a budget.
Lydia Beiler
Thanks, Megan! I was quite happy with how it all turned out. These are definitely white and I think they would look just fine with white appliances! One of things that is super handy about The RTA Store is that you can actually order sample doors to look at and make sure it’s what you want before you go all in and place a big order. You do need to put a deposit down on the sample, but then you get that money back when you return it, so very risk-free and budget friendly. I loved being able to do that and it was extremely helpful since we were trying to decide between a couple of cabinets and there’s just nothing quite like seeing it in real life! I hope that helps and that you are able to find something that works for you that you love!
take 10
Ashley
Does your remodel include lighting (electrical) and plumbing costs? I love the cabinets!
ThriftyFrugalMom
That’s a great question! It did not include plumbing costs. We actually were mostly able to use the plumbing that was already in place so the costs there were pretty much non-existant. And I don’t think we figured the cost of lights into this total. It’s been 2 years since I had done the calculations and I’m a little fuzzy on that, but my husband I are both thinking that we probably didn’t think to include that since we paid for the recessed lighting that we used in the ceiling along with other recessed lights that we used elsewhere in the house. But we have 5 can/recessed lights that we installed. Then we also installed under the cabinet light strips after we moved in because I just felt like I needed more light. Those came from Home Depot and cost around $100 total and I’m so glad that we added them!
Ashley Lukes
How did you wire the lighting? Hard-wired? light switches?
Also, how tall are your ceilings and what is the height of your upper cabinets?
ThriftyFrugalMom
Our ceilings are 9 ft and the height of our upper cabinets are 42 in. We hardwired the lights and have light switches for both the under the counter and celing lights.
Ashley Lukes
How tall are your ceilings and what is the height of the cabinets? Did you hard wire the lights under the cabinets to light switches? Do you know which lights your bought for under the cabinets at Home Depot?
Sarah Kite
Amazing work! Thank you so much for sharing!! Your cabinets look incredible by the way!
ThriftyFrugalMom
Thank you, Sarah! 🙂
Rory
Looks wonderful! Curious as where you found that amazing door?
ThriftyFrugalMom
Thanks, Rory! I love the door too…and we even have a bigger, more amazing version for our front door. Unfortunately (for you anyway), it is an original door that was put in when this house was built years ago. We just cleaned it up and repainted it.
Christine
What are your countertops?
ThriftyFrugalMom
They are concrete. We had a friend that made them for us.